
When using UFlix, you might notice the Force Sync button in the header bar and wonder how data saving works and how often you should click it.
Here is a quick 2-minute breakdown of the differences and the best times to use it.
1. The Key Difference
| Feature | Local Save (In-Browser) | Force Sync (To Cloud) |
|---|---|---|
| Mechanism | Saves changes instantly in your browser | Uploads latest state to your cloud account |
| Speed | Instantaneous (0ms latency, works offline) | Takes 1-2 seconds over internet |
| Purpose | Keeps your library intact across browser restarts | Keeps data perfectly synchronized across devices (PC ↔ iPad ↔ Mobile) |
2. When Should You Click Force Sync?
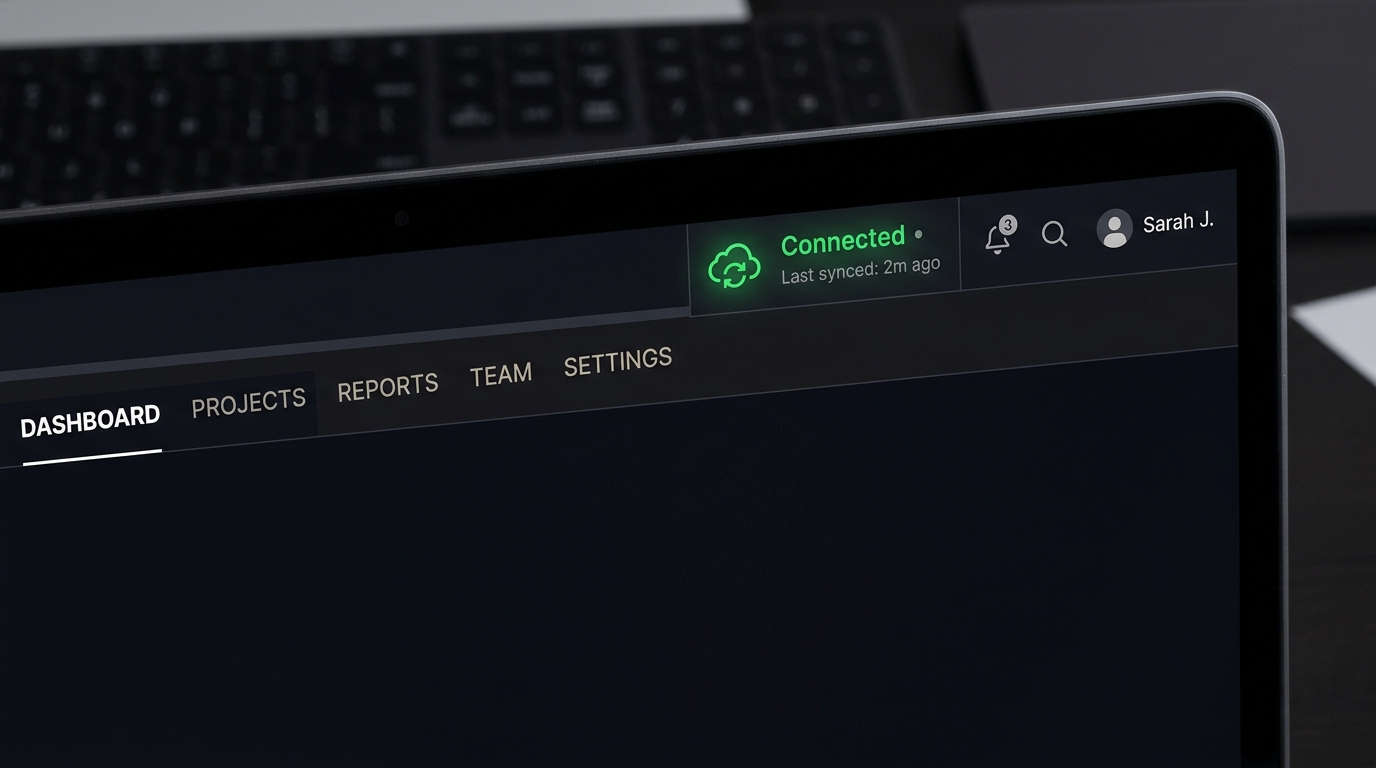
While UFlix automatically syncs data in the background, there are two key moments when manual Force Sync is recommended:
- After Major Library Updates: When you just added a large batch of videos, reorganized tags, or updated custom posters.
- Before Switching Devices: When you finish setting up playlists on your computer and want to immediately continue watching on your iPad or Smart TV.
3. How to Use Force Sync
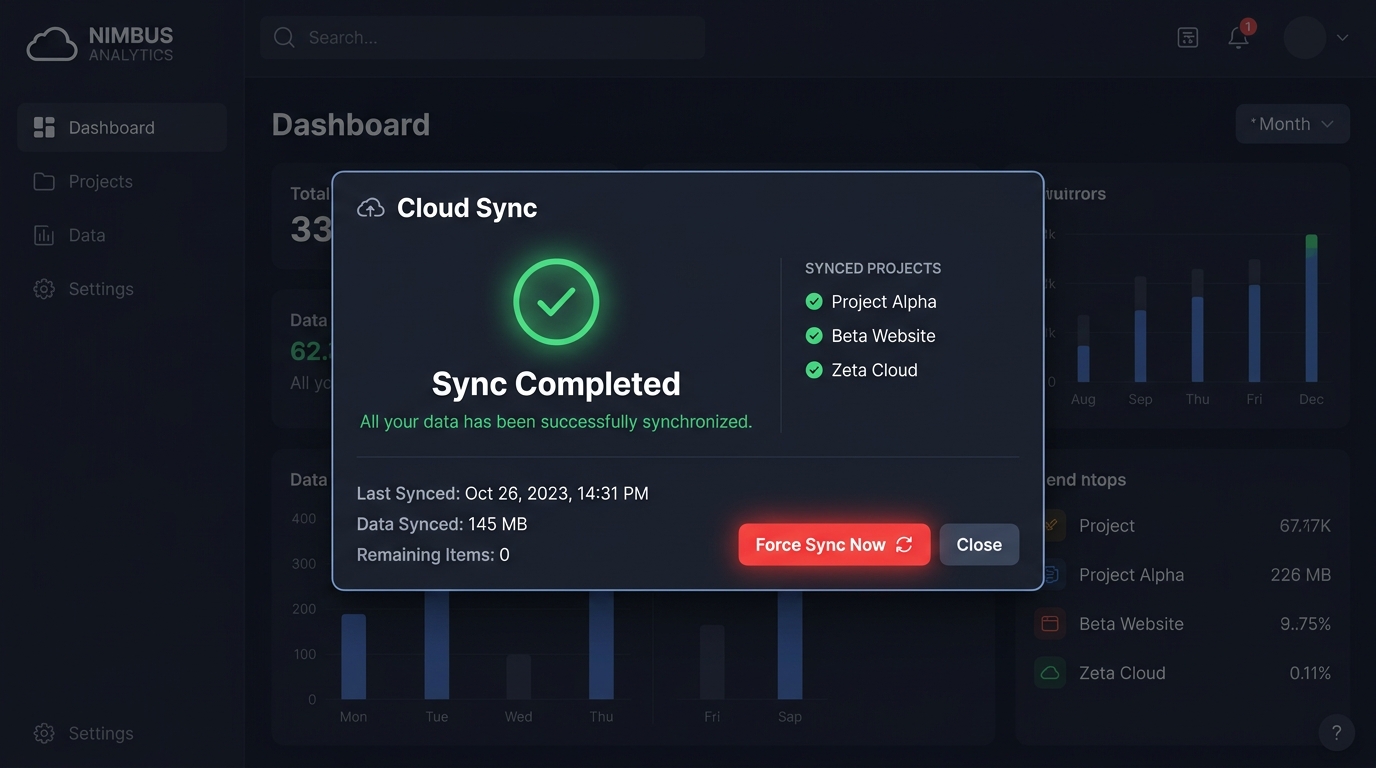
- Click the Cloud Sync icon in the top right menu bar.
- Click the red Force Sync Now button.
- Wait 1-2 seconds until the green checkmark confirms Sync Completed.
4. Optional: Offline JSON Backup (Export Data)
For extra peace of mind or creating manual offline backups:
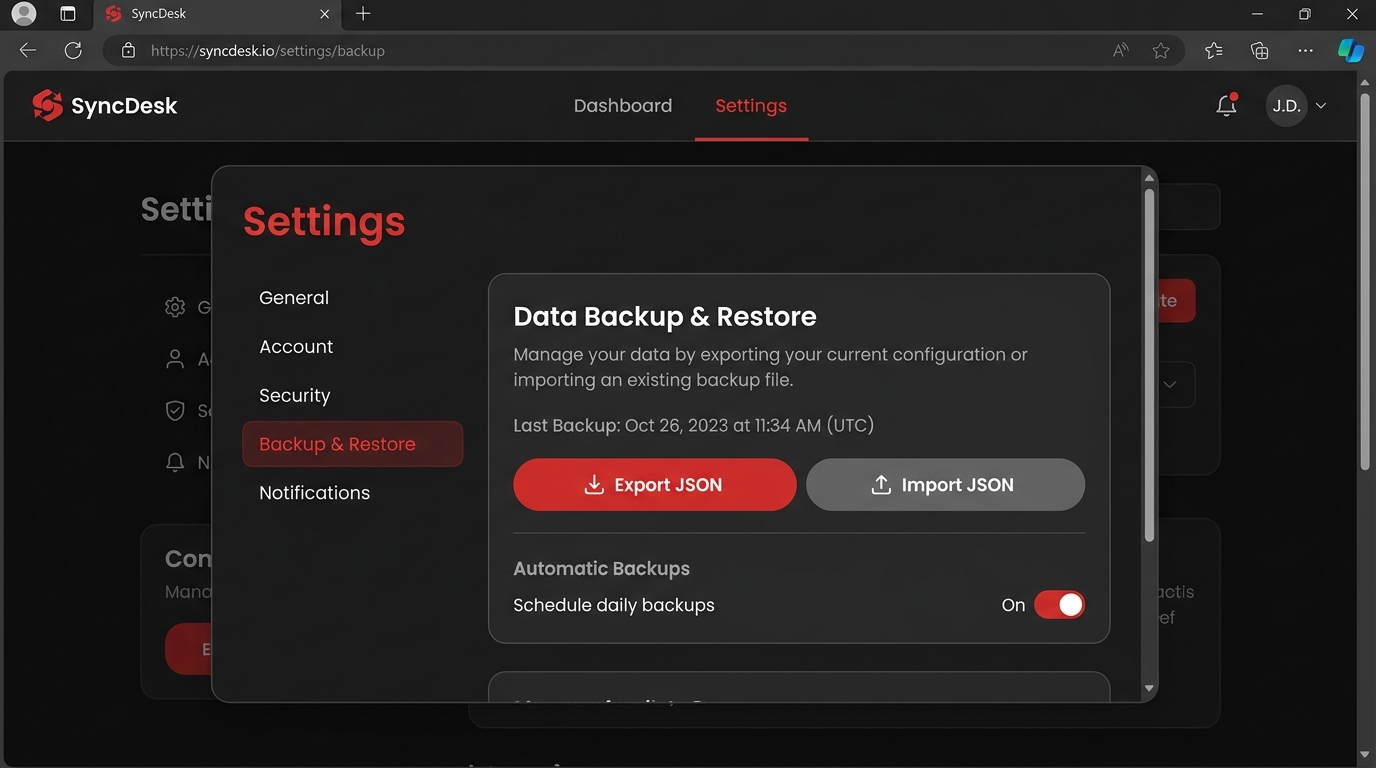
- Go to Settings ➡️ Data Backup & Restore.
- Click Export JSON to download a complete backup file to your computer.
- To restore your library on any fresh device, click Import JSON and select your backup file.
💡 Summary
- Single Device Usage: You don't need to do anything; data saves locally automatically.
- Multi-Device Sync: Click Force Sync Now after making major updates to keep all devices in sync instantly.